Tag Archives: Jinny Beyer

Deconstructing a Quilt

Have you ever looked at a picture of a simple quilt somewhere on the internet and thought you’d like to make it? Perhaps you took a screenshot, or bookmarked it for later or even tried to do the right thing by tracking down the maker only to find no trail or pattern? Presence on the internet fluctuates, people come and go, leaving a digital footprint – dipping in and out as life ‘happens’. These have legal, moral and ethical dilemmas that  legislation have yet to even start addressing – it’s a very large ‘elephant in the room’ getting bigger every day.

It’s easy to identify patterns from professional quilters due to their distinct style, or watermarked image, or in context of their blog, website or social media. These quilters make it easy to comply with the murky waters of copyright!

However, within the millions of shared patchwork images across cyberspace, are those that for a variety of reasons are very difficult for us to acknowledge either the pattern creator or the quilt maker. Most are traditional, or adapted quilts. The shapes themselves are not copyright as such, however written pattern instructions are. So after reasonable attempts to connect with a maker are difficult or fruitless, it comes down to deconstructing a quilt from an image in order to make your own version.

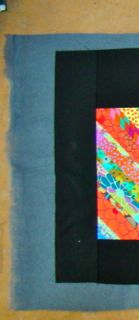
Here’s a snippet of one that caught my eye for an upcoming urgent baby quilt – and I can credit the original maker, Rita Norman ‘Campbell’s Quilt’ Feb 26, 2014. Do I take the time, effort and expense in getting the written instructions? Will the pattern be a digital download? My time also has value. As I have the skills, do I deconstruct the quilt and get on with making my version? Hence the dilemma.

IG Original

It is only a small percentage of patchwork quilting that is really ‘new’ – mainly in the art or textile category. Take a look through the myriad of magazines or books and you’ll be amazed at what talented stitchers have already created! It’s where a lot of current quilters get their inspiration for their own adaptations.

So, I’m confident that this image – which the maker has shared with millions – can be deconstructed. What’s involved in the process? Basically it comes down to a 3 step process.

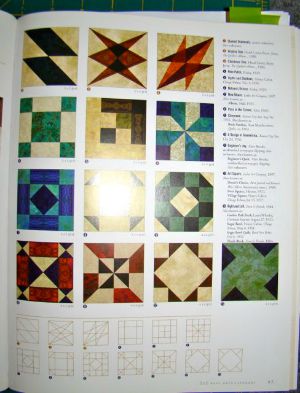
1. Block research: how many blocks, are they the same size?; what are the block, and unit dimensions; is it a well known traditional block, can it be cross-referenced with either Barbara Brackman or Jinny Beyer’s encyclopaedic volumes?

2. Block drafting: can the block be drafted up on graph paper; can the resultant measurements be used to calculate fabric requirements?

3. Block construction: do I have the implied required level of expertise to make the block, and consequently the quilt?

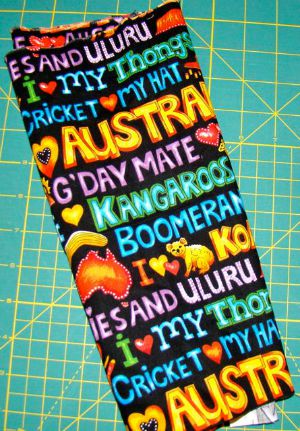
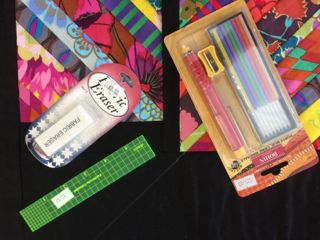
Then comes the fun bits – colour schemes, fabric selection, and sewing!

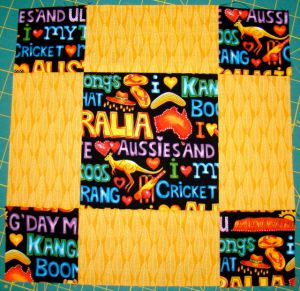
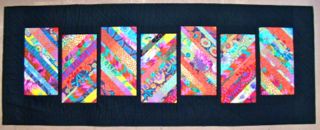
My choices are these, and the sewing has begun…

Fabric Selection

Fabric Swatch

Top made

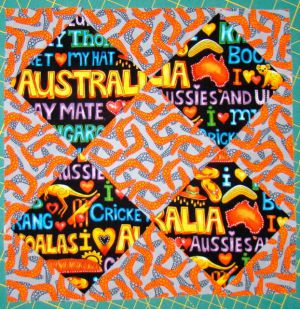
Next comes the basting and the quilting!

Fun! Fun! Fun!

Have you ever deconstructed a quilt?

Cheers

Robyn

African Block Swap #3 and #4

What to do with a fabric that you just don’t want to cut up? Use the K.I.S.S. theory of course.

African Block Swap #3

Text fabric.

So with this fabric which has text, it was back to Jinny Beyer’s ‘The Quilter’s Album of Patchwork Patterns’ to search for suitable layouts. (Page 57, pattern number 4).

Jinny Beyer

‘The Quilter’s Album of Patchwork Patterns’ by Jinny Beyer

A 4 x 4 grid pattern from 1929 looked just right to highlight the text. So African Block Swap #3 was done. A bright background completes this block.

African Block Swap Block #3

African Block Swap Block #3

With some bits of the text fabric left over, what could be done with it? Another 4 x 4 grid, this time ‘Godey Design’ from 1857 looked just right. The challenge was in the drafting up of the block, and the bias cutting for the on-point setting. (Page 60, pattern number 11).

African Block Swap #4

‘Godey Design’ 1857

Boomerangs, Kangaroos and Uluru can be nothing other than Australia!

RobynsPatch

‘Strippy Steps’ is Finished!

Finally finished it. This one was begun on the Ballan Retreat and adapted from a class pattern by Pauline Baber at Patchworks Unlimited.

Kaffe Fasset fabrics

Strip sets laid out on the floor.

Varying widths of strips of Kaffe Fasset fabrics were sewn to a wash away interfacing, using the flip and sew method. Trimmed back to a uniform rectangular shape, the original pattern had them laid out in a chevron row. I thought it could have a better visual design by staggering the blocks, so laid them out on the floor. You know when you get that niggly feeling that it’s not quite right, (that’s usually when a project goes into the UFO pile), so I walked around it, and then went away from it for a while.

A fellow Pascoe Patcher (Sue C)’s passing comment, about Kaffe Fasset fabrics always looking good against black, led to the ‘aha’ moment! So off to the Millrose Cottage next door for some black fabric. So that’s where it stopped at Retreat.

Back home, of course work and normal activity slows down the sewing so it took a while to get back to working on this project (amongst others). How far apart to separate the rectangles, and stagger them up or down, was decided by using Jinny Beyers Golden Gauge Calipers – what a neat gadget. It takes the guess work out of proportions and consequently there is no subconscious niggle when viewing the quilt, that the spacing is not quite right.

Golden Gauge Calipers

Jinny Beyer’s Golden Gauge Calipers

Added a small rectangle to the top or bottom of each rectangle, then a sashing in between to join them together, followed by a border all around. As it is a dark top, a grey wadding/batting was needed.

'Strippy Steps' 02

Grey wadding for the dark top instead of white.

What quilting design to use for this piece was a challenge. With a strong geometric and straight line pattern nothing curved or floral would suit it, so what to do? As Deb Layt says, ‘Let the quilt tell you’, so over a few days of just looking at it came the decision to extend some of the straight lines from the stripes out to the edges. Along the top border going in one direction, and on the lower border, going the opposite direction with nothing crossing over.

'Strippy Steps' 06

Bohn Chalk Pencil, small ruler, and fabric eraser.

Using a chalk pencil to mark the quilt, and sewing with Wonderfil’s Spagetti 12wt black thread on a black fabric, even under lights, takes concentration.

Marking a quilt top

Chalk quilting lines.

Binding done … and it’s finished! Although originally a table runner, DH thought it looked better as a wall hanging – so now there’s a hanging sleeve to put on – if only he had said that before I did the binding! Anyway, it’s another one to tick off the list!

'Strippy Steps'  is finished

Completed quilt.

I rather like this one, bright and bold, hope you do too.

RobynsPatch